Kevin Wilson has long been the most popular member of the Darlington chess club. His entertaining chess and witty banter has entertained both home and away players for years. His involvement with the club's blog has secured at least a favorable write up here!
In this game I ground out a victory after winning a pawn early in the game and pressed the advantage into an ending. It wasn't an easy win, which makes me more proud of the achievement.
Read through the game, or scroll to the bottom to play through the game using GameKnot's ichess viewer.
164 V Kevin Wilson
1. e4 c6 2. d4 d5 The Caro-Kann favorite of many world champions. Why? Because it is very solid, which can lead to White players over reaching.
3. exd5 cxd5 4. Bd3 {The exchange variation is popular at club level as the set up is so easy to remember Bd3/Bf4/c3/Qb3/Nd2/Nf3, but has a drawish reputation.}
4...Nc6 5. Ne2 {White finds another method of defending the d-pawn, c3 is the usual. Therefore White is already deviating from the main exchange set up.}
5...Nf6 6. O-O Bg4 {Perhaps this bishop move isn't the best idea, as the obvious reply is f3 or h3 chasing it away, but f3 especially weakens White's kingside and after Bh5-g6 the bishop will challenge Whites well placed d3 bishop.}
7. f3 Bh5 8. c3 e6 9. Bg5 Bd6 {The idea is to ignore the pin and build up on the b8-h2 diagonal. If White exchanges on f6 then gxf6 is an option to reveal lines of attack on White's castled king.}
10. Nf4? {The knight goes bishop hunting, but I think this is a poor move, as it allows the build up explained in the previous note with a threat.}
10...Qc7 11. g3 {g3 looks a little ugly, but consider some other examples
11.Nxh5 Bxh2+ 12.Kh1 Nxh5
11.Bxf6 Bxf4 12.Bxg7 Bxh2+ 13.Kh1 Rg8 11.Qd2 h6 12.Bxf6 (Nxh5 is line 1, but with the bishop on g5 attacked) Bxf4 losing a piece.}
Back to the game
11...h6 12. Bxf6 Bxf4 13. Be5 {White doesn't want an open or half open g-file, so is forced to retreat the bishop which loses a pawn}
13...Bxe5 14. dxe5 Qb6+ {The check prevents Bb5+}
15. Rf2 Nxe5 16. g4 {Qa4+ looks like a better try, as White's line of play brings the bishop back into play with a gain of tempo.}
16...Nxd3 17. Qxd3 Bg6 18. Qe2 O-O {Black tucks his king away into safety. He has an extra pawn, safer king, Bishop v badly placed knight, weak pawns to target on b2 and f3. Black is better, probably winning, but there is a lot of work to do to collect the full point.}
19. Na3 {How else can the knight develop?}
19...Rac8 {This allows the White queen access to b5, but Black can counter with Qe3 and if the pawn on b7 is captured then White's b-pawn will also fall with a
greater threat on f2.}
20. Re1 a6 {Stopping any entry on b5.}
21. Qe3 Qxe3 {If the rook ending wins for Black then the queen exchange is a very bad move by White, however if the rook ending holds then Black has made the mistake. Usually the side with a material advantage profits from piece exchanges. I would say that Black can win this ending...}
22. Rxe3 b5 {White's knight is frozen out of the game. How can White get the knight involved? Perhaps a
plan based on exchanges on c4?}
23. Ree2 {White is going to reposition the knight via c2. if 23.Nc2 Bxc2 24.Rxc2 allows 24...b4 or 24...d4 when the pawn is pinned.}
23...Rfe8 24. Nc2 Bxc2 25. Rxc2 Rc4 {Black has complete control of the
c-file. The plan is to generate a passed d-pawn. Use the c-file to put
pressure on White's weak pawns and slowly advance the central pawns hoping to
promote the d-pawn}
26. Rcd2 g5 {Fixes the weak f-pawn.}
27. Rfe2 Rec8 28. Kf2 b4 {Creates the passed d-pawn.}
29. cxb4 Rxb4
30. Ke3 Kg7 {The Black king hopes to invade via e5, Black will not allow such a plan to work.}
31. Rc2 Rbc4 {Black will not release control of the only open file.}
32. Rxc4 Rxc4 33. Kf2 d4 {The d-pawn starts rolling, it also takes away the e3 square from the white king. White is now getting squashed. The only concern in this position is the 2 v 1 pawn formation on the queenside.}
34. Rd2 e5 35. Ke2 Kf6 {Perhaps f5 is better here.}
36. Kd3 Rc6 {Time! Take a breath and reassess.}
37. Ke4 Ke6 {The White king has a nice central position, but it can not advance and its only retreat square is d3. Such kings can be easily mated by a rook on e3, or if d3 is covered a pawn check on f5. If a mate can not be delivered the threat can often generate some play.}
38. Re2 {A draw was offered here, but the previous note suggests there is still play in the position. One idea is use the a pawn as a way to gain access into the position by
removing the guard to c3.}
38...f6 39. Rd2 a5 40. Re2 Rc1 {Another idea is to smoke the king out and then ensure it can not return to such a good square.}
41. Kd3 Kd5 42. Rf2 a4 43. Kd2 Rc7 {Yet another idea is an f or a h pawn push which can be supported by a rook.}
There is no need to hurry when playing endgames like these. There is plenty of time to explore all plans, as there is little White can do. In fact its a good idea to play like this as White is walking a tightrope, one slip he is dead.
44. Rf1 f5 45. h3 f4 {The pawn advances, as any pawn race between say a black d-pawn and White's a-pawn will now result in an easy break through}
46. Re1 Rc5 {Frees the king for a stroll if he feels like it.}
47. Kd3 a3 {The pawn crashes into White's duo on a2 and b2. The whole point is to clear the c3 square.}
48.Re2 Rc1 {Black can also invade via the e-file. We could see White offering an exchange of rooks here. But that simply allows the pawns to march on. I can't see how White can hold this position.}
49. Rf2 (49. Rc2 Rxc2 50. Kxc2 axb2 51. Kxb2 Kc4 52. a4 Kb4)
 |
| Analysis |
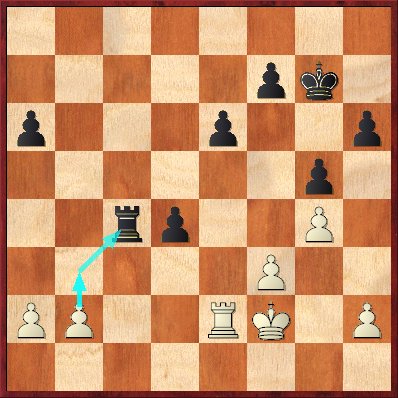
49... Re1 50. bxa3 Re3+ 51. Kc2 Rxa3 52. Kb2 Rc3 {The king is trapped in a tiny box in the corner. Any advance by the a-pawn will be caught by the king.}
53. a4 Kc4 54. Rc2 {White realises the pawn ending is lost.} 0-1


